Saturday, May 22, 2010

Flap Kit Finished!!!

After many night shifts I was able to get back at it. I spent my first three days off reorganizing the garage. Dan H. came by for a visit & to see the project. Dan has the first half of the entire kit and is itching to get started.

I turned the bench to make more room to get around it. I also emptied out the entire east wall into a dumpster. I put my daughter's tornado machine up stairs for storage. (It is cool! That is another story.) Now I need to add more lights so my old eyes can see.

At Dan's suggestion I built a 3' x 8' print reading table. I was able to store the snow thrower under it along with some other keepable materials.

The garage dimensions are 24' x 30'. (With an up stairs.) Should be able to complete most of the construction at home.


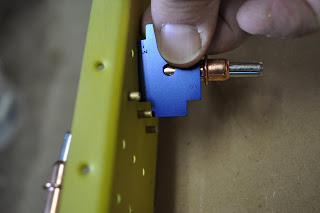
Well, here it is. The completed flap kit. There are a few flubs. I could have done better if I knew what skills were required. I learned a lot about the Mustang II kit from this starter kit.

I've purchased most of the tools need to construct the rest of the plane. The question is, do I go on. It took me a little over 50 hours to construct. (A lot of learning hours!)

I'll be taking a break while I ponder this question. Thanks for all your interests!

Saturday, May 8, 2010

Setting Rivets Part 3

This is a shot of one of the nose ribs & flap ribs that was set with the improved hand squeezer. Nice uniformed shop heads.


Here are the squeezers with the hardware handles installed. The extra leverage really made a difference. If I continue on and do the rest of the kit airplane I will probably purchase a "main squeeze" from Cleveland Tool Company.

That's it for Saturday May 8th. I'll see if I can continue on tomorrow. (It's Mothers Day!)

BWW

Setting Rivets Part 2

After setting each rivet I used the rivet go/no go gauge to insure I set it properly. The gauges are pretty handy to have and help you, the builder, to keep your rivets uniform & right.


Here is a nice row of rivets set with the riveting gun and to proper size. It took about 3 minutes to set. The lens cap is to give some perspective on size.


This is the flap spar & doubler assembly. I used the hand squeezer to set these rivets. I had to extend the squeezers handles to get enough leverage to squeeze the heads. This took a couple of hours to set!

Setting Rivets Part 1


Time to start riveting the assembly together. I made my own back riveting slab of steel by stoning a 4" by 15" by 3/8" of cold rolled steel.

I did this in between all the other work I was doing on the flap.


Next, I took the rivets and placed them into the lower skin flap dimples and held them in place with riveting tape. I flipped the flap skin over with the taped rivets pointing up.


I aligned the back riveting plate so it was directly under the rivets and placed the flap skin stiffener into place.


Then I set the rivets with the pneumatic riveting gun. This was very easy to do. The other riveting I did was really tough!

(Continued in next post.)

Tuesday, May 4, 2010

Corrosion Protection

The tool I needed for dimpling the flap skins rivet holes arrived last Friday. I was able to dimple the holes successfully with the new tool on Monday (05/03/10)

After dimpling, I corrosion proofed the skins and ribs with a Zinc Phosphate primer I purchased from Aircraft Spruce. I cleaned the surface with alcohol to remove any oils or contaminates prior to spraying on the paint. The paint/primer meets Federal Specification T-P-1757A for corrosion protection.

Today, I took the first steps in final assembly by Cleco-ing together the flap spar, spar doubler, ribs, & nose ribs. The assembly instructions say to rivet the pieces together using the hand squeezer.

With the jaws I have I can not reach around the spar with the squeezer, so I ordered a "C" riveting tool that will attach to the pneumatic rivet gun. The tool should be here by this week end when I am off again.


I found the AN470AD-4-5 rivets were too long and the AN470AD-4-4 rivets were too short. I trimmed the -4-5s down a little with the rivet cutting tool.

Here I am using the rivet length measuring tool to trim the rivet to proper length for riveting.


Here are the rivets, an AN470AD-4-5 untrimmed and one that has been cut in the cutting tool.

This up coming weekend I will be off and should be able to start riveting the assembly together.

Later,
BWW