 Riveting the bottom skin takes a little planning and some help from a fellow builder. My arms are not long enough to hold the pneumatic rivet gun and the bucking bar.
I rigged the skin so I could reach underneath in some of the areas. There were also some access holes on the top side to reach through. Still it was fun.
We started at the main spar and worked our way to the trailing edge.

Looking up at the main spar joint. Used a few cushions to raise myself up to a comfortable position. I still had to reach all the way up to the spar.
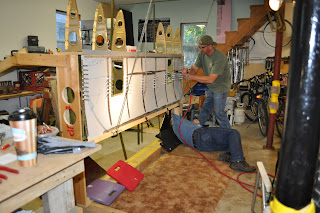
I'm on the floor with the bucking bar and Dan H. is on the gun. If you get a good rhythm and timing thing going, the riveting goes pretty good.
The 1/8" rivets in the main spar were a little harder to drive. A few more "beats" on the hammer then on the 3/32" rivets. The 3/32" rivets held a majority of the skin to the bottom rib structure.

It sure helped to have those under seat storage holes! For most of the center of the center wing section I was able to reach through some type of access hole. A lot easier then lying on the floor and reaching up.
My florescent drop light fit right in to add a little light to the situation.

Here I am at the trailing edge of the center wing section. I'm using the main squeeze to set the last row of 1/8" rivets. I know some of the builders prefer a pneumatic squeezer, but for the few rivets needed to be squeezed this is pretty easy.
Next step is to get some iron welded up to make a fixture to hold the center section flat and level. Then I'll be able to start on the forward fuselage structure.
Later,
BWW
No comments:
Post a Comment